In this new post I explain how to start with Unity 2021 and the basic interaction with the Unity Editor, navigate the functions of the editor.
Why Unity?
C# is one of the most popular programming languages which is used to create games in the Unity game engine. Experiences (games, AR/VR apps, etc) built with Unity have reached nearly 3 billion devices worldwide.
Why is C# widely-used to create games? How does it compare to C++? How is C# being used in other areas such as mobile and web development?
I think Unity chose to move forward with C# instead of Javascript or Boo because of its learning curve and its history with Microsoft. [Boo was one of the three scripting languages for the Unity game engine until it was dropped in 2014].
In my experience, C# is easier to learn than languages like C++, and that accessibility is a huge draw for game designers and programmers in general. With Xamarin mobile development and ASP.NET web applications in the mix, there’s really no stopping the C# language any time soon.
Install Unity (Windows)
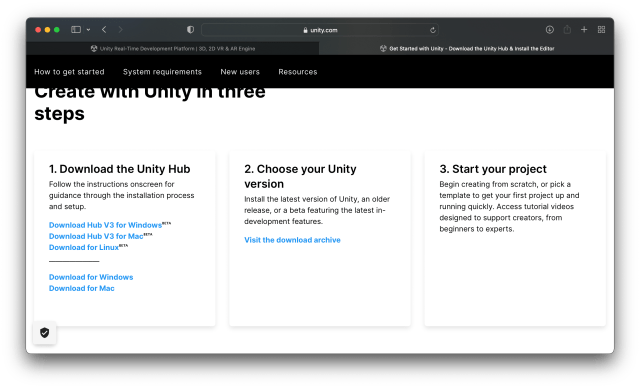
First, go to the Unity website and select the button Get started (see screenshot below).

This will take you to the Unity store page. This page looks like the screenshot below. Select the Individual option. The other paid options offer more advanced functionalities and services, but you can check these out on your own.

I chose Personal and then click on Get started again. Download the app and install it. Then, the installer asks you to download the Unity Editor. Click on Install Unity Editor.

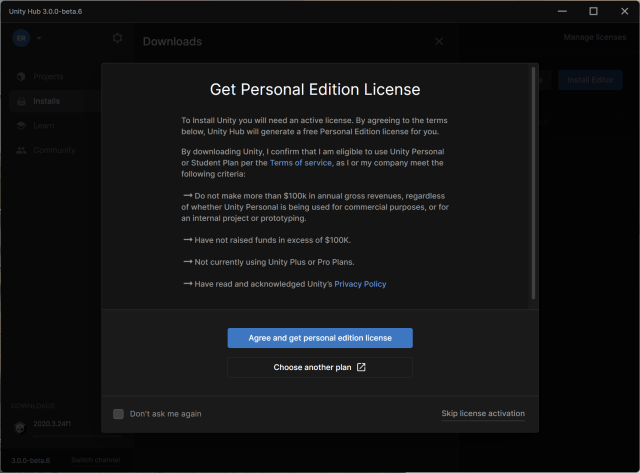
Then, you have to accept the licence before proceeding.
Downloading and installing all the components require between 15 and 30 minutes. So, take a cup of tea and see you in a bit.
Install Unity (Mac)
So, you can install Unity also for Mac. From the Unity website, under Download, you can download the Unity Hub V3 for Mac.
Then, launch the Unity Hub installer and the first think you have to do is to accept the licence.

Then, copy Unity Hub in the application folder.
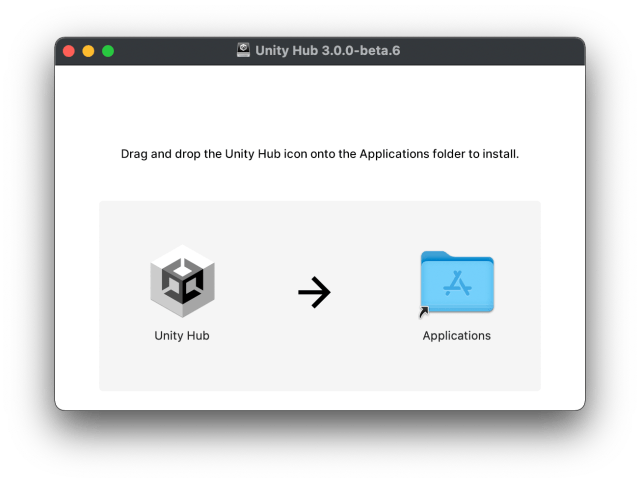
Now, you can go to the Applications folder and run Unity but before you have to allow macOS to open the application because it was downloaded from the internet and not from the Apple Store.

Finally, you have your Unity Hub open.

Now, you have to create a new account or use an existing one. After that, like in the Windows version, you have to accept the licence, again, and download the Unity Editor.
Creating a new project
When you launch the Unity Hub application, if you have created an account, you have a button on the top right “New project“.

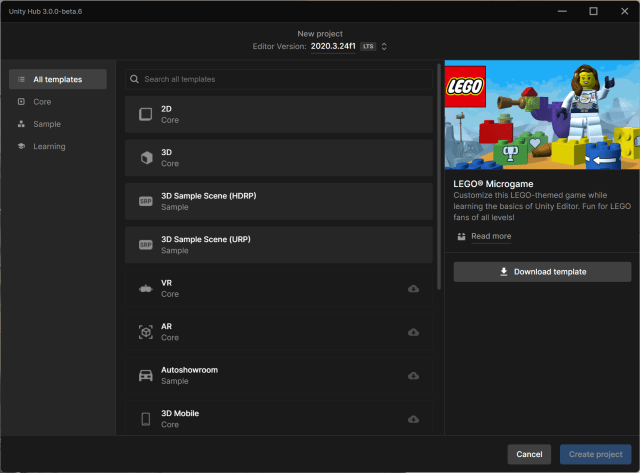
If you click on the button “New project”, you have few choices. As you see, you can download different templates like the Lego templates.
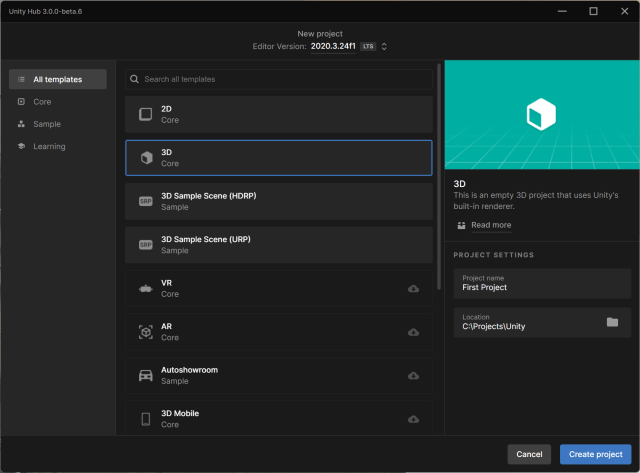
So, for this first project I select 3D as template, First Project as Project Name and then the Location.
With the project created, you’re all set to explore the Unity interface! You can re-open your project anytime from the Projects panel in Unity Hub.
Navigation the editor
When the new project finishes initializing, you’ll see the glorious Unity Editor! I’ve marked the important tabs (or panels, if you prefer) in the following screenshot:
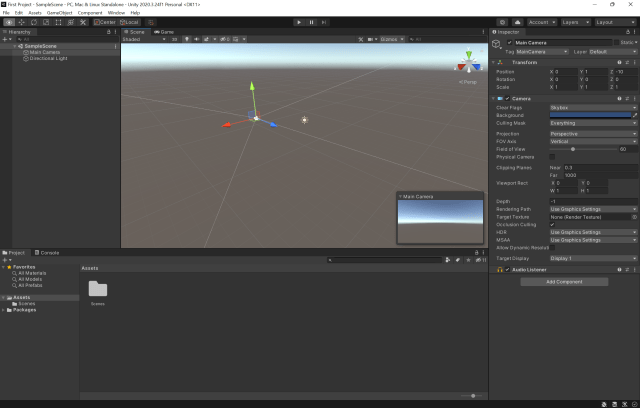
So, let me explain what we have in front of us. I added the number so it is easy to explain.

- The Toolbar panel is the topmost part of the Unity Editor. From here, you can manipulate objects (far-left button group) and play and pause the game (center buttons). The rightmost button group contains Unity services, Layer Masks, and layout scheme features, which we won’t be using in this book because they don’t apply to learning C#.
- The Hierarchy window shows every item currently in the game scene. In the starter project, this is just the default camera and directional light, but when we create our prototype environment, this window will start to get filled in.
- The Game and Scene windows are the most visual aspects of the editor. Think of the Scene window as your stage, where you can move and arrange 2D and 3D objects. When you hit the Play button, the Game window will take over, rendering the Scene view and any programmed interactions.
- The Inspector window is your one-stop shop for viewing and editing the properties of objects in the scene. If you select the Main Camera GameObject in the Hierarchy, you’ll see several parts (Unity calls them components) are displayed—all of which are accessible from here.
- The Project window holds every asset that’s currently in your project. Think of this as a representation of your project’s folders and files.
- The Console window is where any output we want our scripts to print will show up. From here on out, if we talk about the console or debug output, this panel is where it will be displayed.
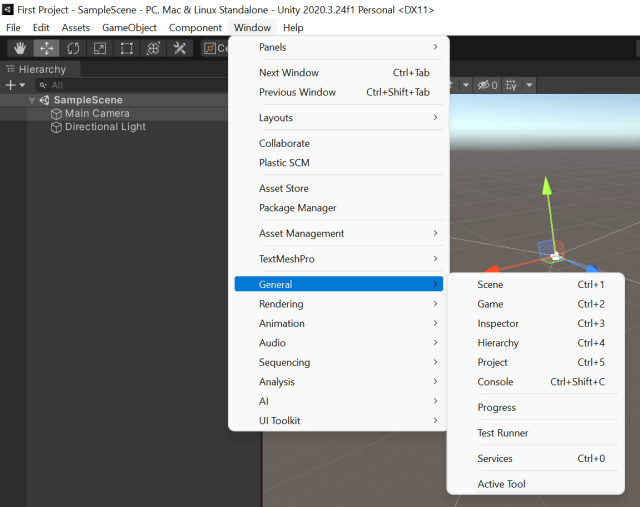
Re-open default windows
If any of these windows get closed by accident, you can re-open them anytime from Unity | Window | General.
Set up Visual Studio (Windows)
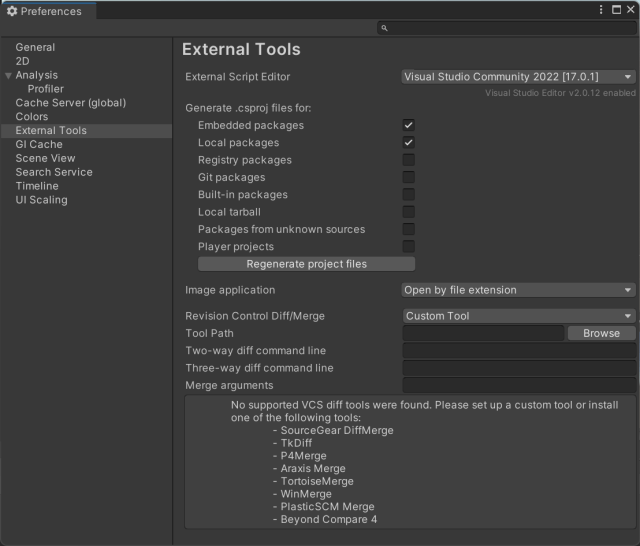
Before continuing, it’s important that Visual Studio is set up as the script editor for your project. Go to the Unity menu | Preferences | External Tools and check that External Script Editor is set to Visual Studio for Mac or Windows:
So, in the following screenshot you see my settings for Windows and Visual Studio 2011.
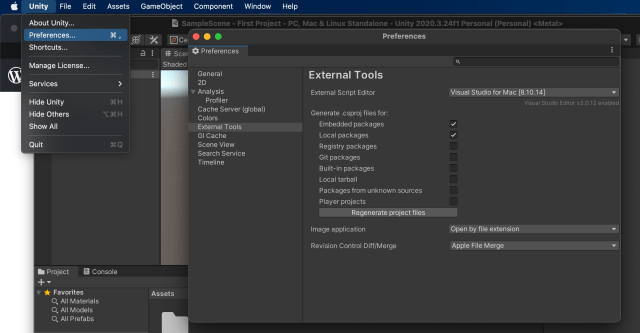
Set up Visual Studio for Mac
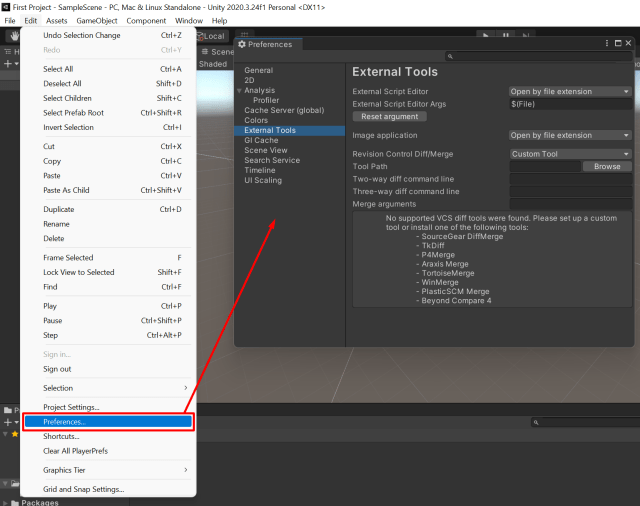
If you are using a Mac, you find the External Tools under the Unity menu and then Preferences…
Change theme
Then, if you want to change the Editor Theme, under General, you can select Dark or Light.

Using C# with Unity
Now, going forward, it’s important to think of Unity and C# as symbiotic entities. Unity is the engine where you’ll create scripts and game objects, but the actual programming takes place in Visual Studio.
Working with C# scripts
So, even though we haven’t covered any basic programming concepts yet, they won’t have a home until we know how to create an actual C# script in Unity. A C# script is a special kind of C# file in which you’ll write C# code. These scripts can be used in Unity to do virtually anything, from responding to player input to creating game mechanics.
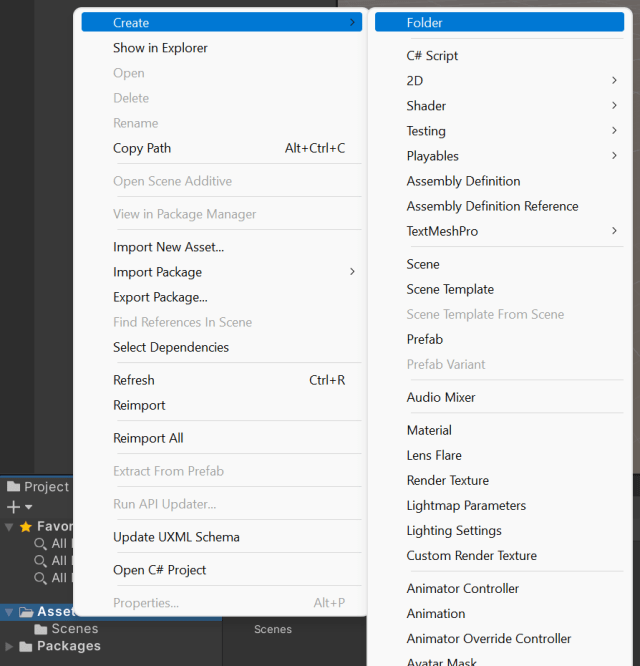
There are several ways to create C# scripts from the editor:
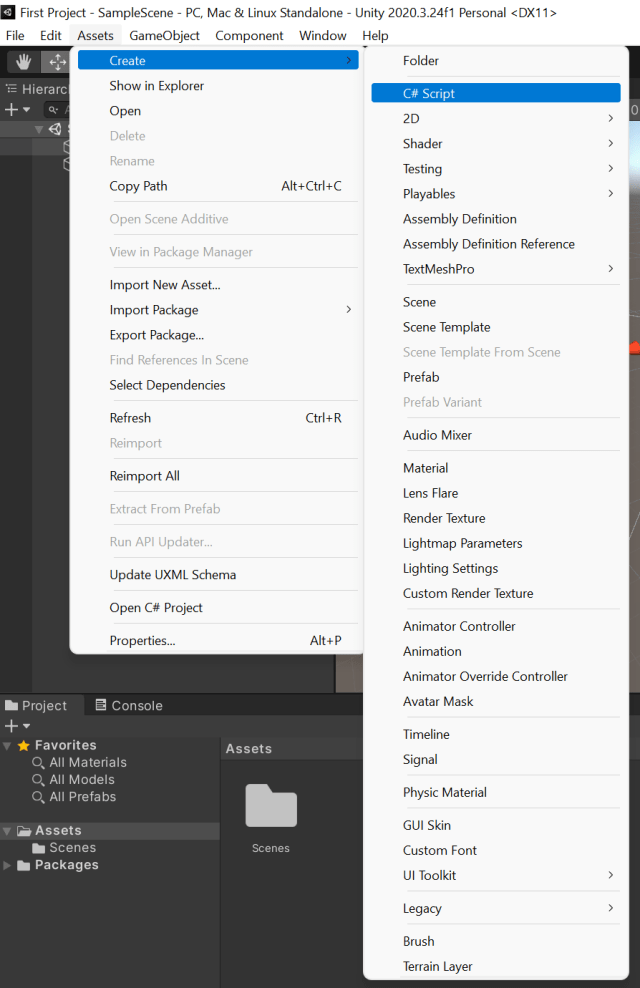
- Select Assets | Create | C# Script
- Right under the Project tab, select the + icon and choose C# Script
- Right-click on the Assets folder in the Project tab and select Create | C# Script from the pop-up menu
- Select any
GameObjectin the Hierarchy window and click Add Component | New Script
For the sake of organization, we’re going to store our various assets and scripts inside their marked folders. This isn’t just a Unity-related task—it’s something you should always do, and your coworkers will thank you (I promise):
- From the Project tab, select + | Folder (in the following screenshot I’ve selected Assets | Create | Folder) and name it
Scripts
- Double-click on the Scripts folder and create a new C# script. By default, the script will be named
NewBehaviourScript, but you’ll see the filename highlighted, so you have the option to immediately rename it.
Double-click on the file will open Visual Studio immediately. The boilerplate code you see is
using System.Collections;
using System.Collections.Generic;
using UnityEngine;

public class NewBehaviourScript : MonoBehaviour
{
    // Start is called before the first frame update
    void Start()
    {

    }

    // Update is called once per frame
    void Update()
    {

    }
}
Exploring the documentation
The last topic we’ll touch on in this first foray into Unity and C# scripts is documentation. It’s important to form good habits early when dealing with new programming languages or development environments.
Accessing Unity’s documentation
So, once you start writing scripts in earnest, you’ll be using Unity’s documentation quite often, so it’s beneficial to know how to access it early on. The Reference Manual will give you an overview of a component or topic, while specific programming examples can be found in the Scripting Reference.
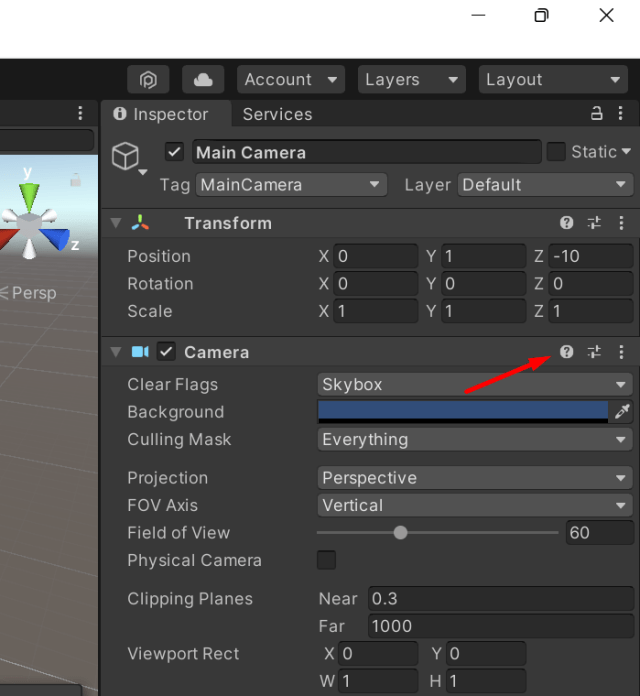
Every game object (an item in the Hierarchy window) in a scene has a Transform component that controls its Position, Rotation, and Scale. To keep things simple, we’ll just look up the camera’s Transform component in the Reference Manual:
- In the Hierarchy tab, select the Main Camera game object
- Move over to the Inspector tab and click on the information icon (question mark) at the top right of the Transform component: