
In this post, I want to share with you an awesome way for testing PowerShell scripts with Pester, a framework for PowerShell script testing and mocking. The interesting part is that test scripts can work in a Azure pipeline.
What is Pester?
Pester is a testing and mocking framework for PowerShell.
It provides a framework for writing and running tests. Pester is most commonly used for writing unit and integration tests, but it is not limited to just that. It is also a base for tools that validate whole environments, computer deployments, database configurations and so on.
Pester follows a file naming convention *.Tests.ps1, and uses a simple set of functions: Describe, Context, It, Should and Mock to create a mini-DSL for writing your tests.
Pester tests can execute any command or script that is accessible to a Pester test file. This includes functions, Cmdlets, Modules and scripts. Pester can be run locally, where it integrates well with Visual Studio Code, and it can of course be integrated into a build script in a CI pipeline.
Pester contains a powerful set of Mocking capabilities that allow tests to replace the behavior of any command inside of a piece of PowerShell code being tested. See Mocking with Pester.
Pester can produce artifacts such as Test Results file and can be used for generating Code Coverage and Test Result files for reporting results in CI pipeline.
Installing Pester
To install Pester it is usually enough to just do
Install-Module Pester -Force
Now, before seeing a real example, I like to spend few words about Windows PowerShell ISE.
What is Windows PowerShell Integrated Scripting Environment (ISE)?
The Windows PowerShell Integrated Scripting Environment (ISE) is a graphical user interface and front-end hosting application for Windows PowerShell. The ISE lets developers run PowerShell commands and create, test and refine PowerShell scripts without operating directly in the traditional PowerShell command-line interface (CLI).
At first glance, PowerShell ISE is a convenient graphical user interface (GUI) for the PowerShell console. The ISE provides a variety of editing controls, user help and other ease-of-use features that aren’t readily present in PowerShell. For example, the ISE supports multi-line editing, tab completion, syntax-based coloring, selective execution, context-sensitive help and multi-language support. Menu options and keyboard shortcuts in the ISE mimic many of the common tasks traditionally performed in the PowerShell console.
PowerShell ISE features
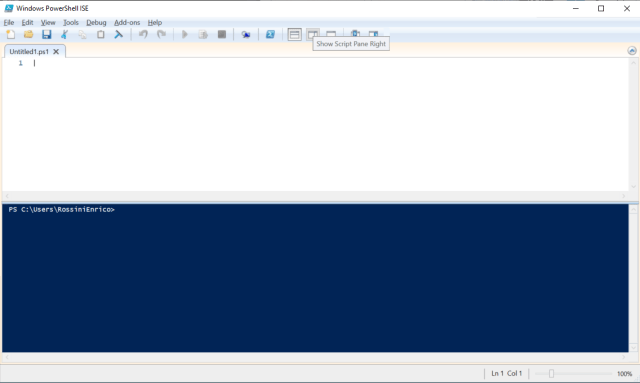
A typical Windows 10 PowerShell ISE appears below. The conventional console area – the Console pane – is delineated in dark blue. A suite of familiar file and view controls are positioned along a top toolbar, including buttons to start a remote PowerShell session as well as a conventional PowerShell console.
PowerShell ISE users can access help for the ISE by clicking the Help button in the top toolbar and selecting Windows PowerShell ISE Help. This opens a web page that offers descriptions and details of the PowerShell ISE and further reading.
One key feature of the ISE is access to a complete library of PowerShell scripting language commands available from a command window located on the right. Developers can locate a command alphabetically and, by command group — which is filterable — drill down to enter all relevant parameters within the right panel. They can then insert the properly configured command into the console without the need to type the entire command by hand.
A second core feature of ISE 2.0 is support for up to 32 concurrent execution environments. Previous versions of ISE supported only up to eight. This might seem like a great deal of multitasking. But developers can use this capability to work with related scripts and make real-time tweaks and enhancements while seeing the immediate effects of their changes across other related scripts.
Other features of the ISE are related mainly to editing support. For example, the ISE supports multiline editing, allowing blank or new lines to be inserted beneath selected lines within the Command pane. Selective execution enables developers to run or test desired parts of the script by highlighting the desired portion of the script and clicking the Run Script button or pressing the F5 button. Similarly, users can add breakpoints to check variables and review script behaviors at critical points. Text copying and pasting is supported. A context-sensitive help system provides additional information about any item. The ISE itself has some customization options, and users can tailor text colors, fonts and layouts; add line and column number; and adjust keyboard shortcuts.
Later versions of the PowerShell ISE add autocomplete capabilities for cmdlets, parameters, files and values. Autosave capabilities store the script every few minutes to avoid content loss if a crash occurs. The Snippets function saves short segments of code for reuse, and a most recently used list offers fast access to recent files. PowerShell ISE merges the command and output panes into a single view to more closely reflect the response of the PowerShell console. Users can extend the features and functionality of PowerShell ISE with code based on the ISE Scripting Object Model.
Uses of PowerShell ISE
The Windows PowerShell ISE is fundamentally an editing tool that is used to create, edit, test and execute PowerShell scripts in Windows environments. The ISE offers a more flexible and interactive editing and execution environment than a traditional PowerShell console.
- Save time and reduce errors when creating scripts. Scripts routinely employ long sequences of complex command lines, each with granular parameters. It’s possible to construct the same script in PowerShell and the PowerShell ISE. But ISE features such as an interactive index of available commands and context-sensitive make it easy to find important commands, select proper parameters within the pane and then drop the properly formatted command into the script. This – along with other editing niceties such as copy and paste – can save time by speeding up proper command formatting as well as reducing common typing and syntactic errors that can be time-consuming to find and fix.
- Improve script debugging and testing. A script is basically a short piece of software where the instructions involve the PowerShell scripting language. As with any software, there are bound to be errors, oversights and unintended consequences produced by the script. ISE features such as an integrated debugger and syntax highlighting can highlight common errors and recommend fixes before the script is ever executed. Additional capabilities such as breakpoints and selective execution let developers check desired portions of the script and intentionally stop execution at critical points in the script to inspect the state of important variables and other behaviours.
- Get greater insight into related scripts. Scripts can be highly interactive entities where one script interacts with other scripts. This can result in complex relationships that can be difficult to follow with vanilla execution engines, such as PowerShell. The ISE supports multiple simultaneous execution environments, letting developers load and follow the cause-and-effect relationships among several scripts at the same time. The ISE helps with troubleshooting, especially after a change in one script triggers an unexpected behaviour or error in another.
PowerShell vs. PowerShell ISE
PowerShell and PowerShell ISE both provide fundamentally the same scripting capabilities for Windows environments. The principal difference between the two is convenience. PowerShell is a simpler and more straightforward scripting and execution environment, while the ISE provides more flexible and forgiving editing and execution features. PowerShell can be a good platform for simple tasks where actions are clear. The ISE is preferable when scripting tasks are larger, more complex and interrelated.
A comparison of word processors offers a sound analogy. A tool such as Notepad can be ideal to create and edit notes and short, straightforward text. But a tool such as Word provides far more editing features, fonts, colours, formatting, and spelling and grammar checks. Thus, Word could be a preferable tool for complex tasks, such as professional report writing and developing a book chapter. Still, both tools are word processors.
Advantages of PowerShell ISE
To summarize, the advantages of PowerShell ISE include the following:
- saved time;
- fewer errors when creating scripts;
- similar keyboard shortcuts replicating tasks possible in PowerShell;
- improved debugging and testing; and
- greater insight into related scripts.
Disadvantages of PowerShell ISE
The disadvantages of PowerShell ISE include the following:
- unnecessary complexity for certain tasks;
- lack of support for interactive sessions;
- limited paging;
- lack of support for certain legacy commands.
How to run PowerShell ISE
Windows PowerShell ISE is available in Windows 11, 10, 8.1, 8.0, and 7 as well as Windows Server 2008 R2 SP1 and later. PowerShell ISE can be launched on a PC in either one of two ways:
- Click Start, search for PowerShell in the Search bar and then select Windows PowerShell ISE from the resulting list of apps.
- Open the Windows Run prompt or any command shell, type powershell_ise.exe and press Enter.
Once the ISE is launched, users can employ the ISE in several common ways.
- Use the Console pane. Once the ISE starts, it functions exactly like PowerShell, and users can enter commands into the Console pane – the large, dark blue area of the GUI – just as if it were PowerShell. For example, to run a command, just type the command into the Console pane at the command prompt and press Enter. Users can enter and execute multiple commands by using
Shift+Enter– basically a line return – between commands. Users can stop the execution of a command with the Stop Operation button in the GUI or withCtrl+Breakon the keyboard. - Create and use tabs. PowerShell ISE 2.0 supports up to 32 simultaneous but independent execution environments or sessions. Each environment is referred to as a tab, and users can switch between tabs at-will. To create a new tab, click New PowerShell Tab on the File menu. Users can opt to create and use a remote PowerShell tab to establish a session on a remote computer, though this requires additional details to log in and access the remote computer.
- Manage breakpoints for debugging. The ISE supports the use of breakpoints, which are points in the script where operation is paused for manual inspection of variables and environments. Once a breakpoint is encountered, the user can run commands to examine the state of the script, make changes to the state of the script and even resume operation of the script. Users can employ line breakpoints to pause at specific places, variable breakpoints to pause when a desired variable changes and command breakpoints to pause when a desired command is encountered. The ISE lets users set, remove and enable/disable breakpoints.
- Run a profile when the ISE starts. A profile is a script that runs when a session is started. A profile can be vital to configure the PowerShell ISE environment for aliases, functions, variables, colors and fonts, and other preferences used in the ISE session or tab. Users can create, select, edit and enable/disable profiles in the ISE.
- Write and run scripts. The core use for the ISE is to write, edit and run Windows PowerShell scripts. Script files can include conventional script files (.ps1), script data files (.psd1) and script module files (.psm1) as well as other files such as configuration files (.ps1xml), XML files and text files. To create a new script file, click New on the toolbar or click New on the File menu. The new empty file appears in a new file tab. Users can add commands and data to compose the script. To run the script, click Run Script on the toolbar or click Run on the File menu. To run just a part of the script, select or highlight the desired portion of the script and click Run Selection on the File menu or click Run Selection on the toolbar.

