In this new post, I continue to add more features to the integration with external providers in AdminLTE project built with ASP.NET Core. Here the previous posts:
- Integrated AdminLTE in a ASP.NET Core project
- Features for AdminLTE with ASP.NET Core
- Integration with Identity in AdminLTE project
Generally speaking, this post explains how to add external providers to any project using Microsoft Identity.
So, the external providers I’m going to integrate are:
Let’s see how to doing from the beginning. Remember that you find all code on GitHub. If you have any question, please use my forum.
Table of contents
Update appsettings.json
First, I want to show you how to update the appsettings.json to store all the settings we need for each provider. Also, I am a great fan of IdentityServer and you find a lot of posts about it in this blog. So, I decide to have only one section for authentication: it is easy to understand and manage. What the configuration looks life now?
{
  "Logging": {
    "LogLevel": {
      "Default": "Information",
      "Microsoft": "Warning",
      "Microsoft.Hosting.Lifetime": "Information"
    }
  },
  "AllowedHosts": "*",
  "ConnectionStrings": {
    "ApplicationDbContextConnection": ""
  },
  "SmtpCredentials": {
    "MailFrom": "",
    "Username": "",
    "Password": "",
    "Server": "smtp-mail.outlook.com",
    "Port": 587,
    "EnableSSL": true
  },
  "Authentication": {
    "UseIdentityServer": true,
    "IdentityServer": {
      "IdentityServerUrl": "https://youridentityserver.com",
      "ClientId": "",
      "ClientSecret": ""
    },
    "Facebook": {
      "AppId": "",
      "AppSecret": ""
    },
    "Google": {
      "ClientId": "",
      "ClientSecret": ""
    },
    "Microsoft": {
      "ClientId": "",
      "ClientSecret": ""
    },
    "Twitter": {
      "ConsumerAPIKey": "",
      "ConsumerSecret": ""
    }
  }
}
So, Logging and AllowedHosts come from the basic configuration. SmtpCredentials came with the implementation of the confirmation and password recovery from my previous post. Then, the new section Authentication.
Authentication section
Generally speaking, my applications are using IdentityServer for authentication but not all of you like or want to use it. So, there is a configuration for that: the setting UseIdentityServer determines if you want IdentityServer and the value is true or you prefer to use Microsoft Identity and the value is false. For the purpose of this post, the default value is false so we can integrate other provider in the application. If you prefer to use IdentityServer, you have only to add the IdentityServerUrl, ClientId and ClientSecret.
Then, there is a section for each provider and the values I want to save. Accordingly with the provider, the setting names are different. So, it is easy to copy and paste the values.
Because the application reads these settings only when it starts, I won’t create a model for these settings. Instead, in the Settings.cs, I’m going to add a section to configure the authorization in accord with the settings.
First, I check if the application has to use UseIdentityServer and if yes, there is the code for this configuration that I will discuss in another post.
Before anything else, I have to add the NuGet packages for the authentication. So, right click on the project and then select Manage NuGet pakcages…

Add the following packages:
- Microsoft.AspNetCore.Authentication.Facebook
- Microsoft.AspNetCore.Authentication.Google
- Microsoft.AspNetCore.Authentication.MicrosoftAccount
- Microsoft.AspNetCore.Authentication.Twitter
Also, there is a document in the Microsoft documentation how to add more external providers but you have to write custom code for that.
Update Startup.cs
Now, in the Startup.cs I have to add the authentication with a provider only if the credentials are specified. For that, for each provider I check if clientId and ClientSecret have a value and if yes, I add the authentication. Here the code.
if (!string.IsNullOrEmpty(Configuration["Authentication:Facebook:AppId"]) &&
    !string.IsNullOrEmpty(Configuration["Authentication:Facebook:AppSecret"]))
{
    services.AddAuthentication().AddFacebook(facebookOptions =>
    {
        facebookOptions.AppId = Configuration["Authentication:Facebook:AppId"];
        facebookOptions.AppSecret = Configuration["Authentication:Facebook:AppSecret"];
    });
}
if (!string.IsNullOrEmpty(Configuration["Authentication:Google:ClientId"]) &&
    !string.IsNullOrEmpty(Configuration["Authentication:Google:ClientSecret"]))
{
    services.AddAuthentication().AddGoogle(googleOptions =>
    {
        googleOptions.ClientId = Configuration["Authentication:Google:ClientId"];
        googleOptions.ClientSecret = Configuration["Authentication:Google:ClientSecret"];
    });
}
if (!string.IsNullOrEmpty(Configuration["Authentication:Microsoft:ClientId"]) &&
    !string.IsNullOrEmpty(Configuration["Authentication:Microsoft:ClientSecret"]))
{
    services.AddAuthentication().AddMicrosoftAccount(microsoftOptions =>
    {
        microsoftOptions.ClientId = Configuration["Authentication:Microsoft:ClientId"];
        microsoftOptions.ClientSecret = Configuration["Authentication:Microsoft:ClientSecret"];
    });
}
if (!string.IsNullOrEmpty(Configuration["Authentication:Twitter:ConsumerAPIKey"]) &&
    !string.IsNullOrEmpty(Configuration["Authentication:Twitter:ConsumerSecret"]))
{
    services.AddAuthentication().AddTwitter(twitterOptions =>
    {
        twitterOptions.ConsumerKey = Configuration["Authentication:Twitter:ConsumerAPIKey"];
        twitterOptions.ConsumerSecret = Configuration["Authentication:Twitter:ConsumerSecret"];
        twitterOptions.RetrieveUserDetails = true;
    });
}
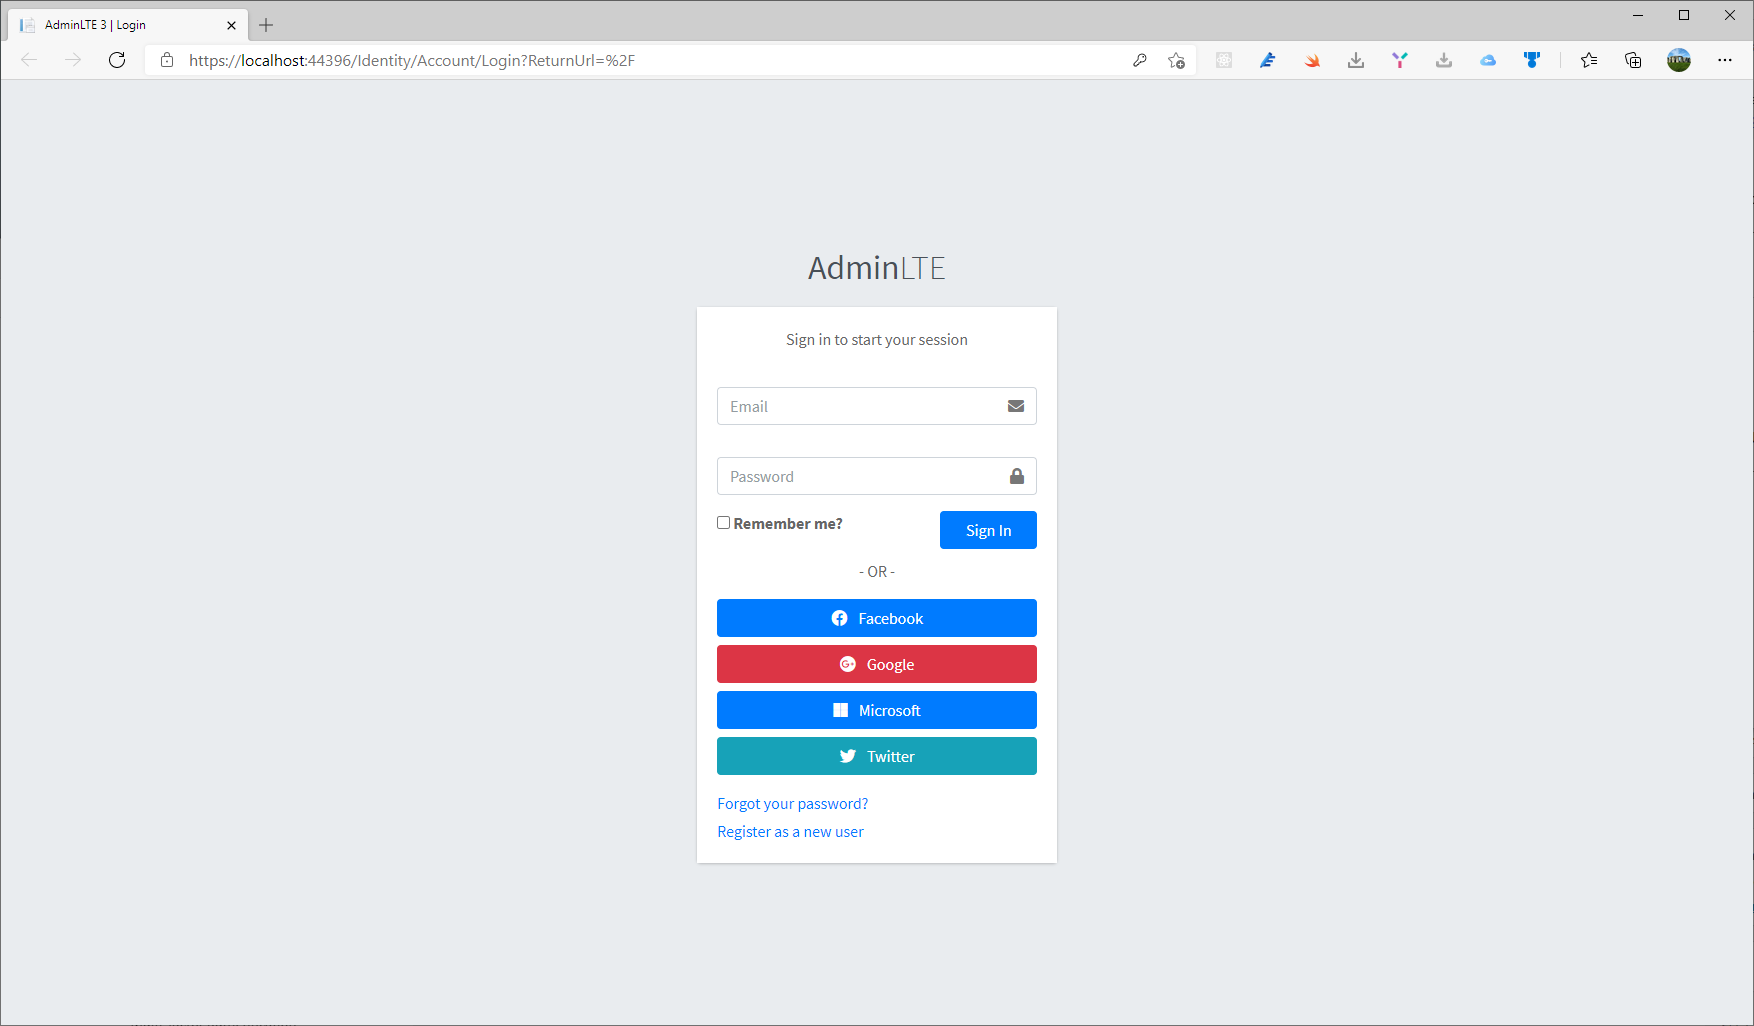
So, simple and straightforward. Now, few adjustments in the Login.cshtml. I want to display a custom button for each provider. There is asection for social-auth-links and I’m going to add some code.
<div class="social-auth-links text-center mb-3">
    <p>- OR -</p>
    @{
        if ((Model.ExternalLogins?.Count ?? 0) == 0)
        {
            <div>
                <p>
                    There are no external authentication services configured.
                </p>
            </div>
        }
        else
        {
            <form id="external-account" asp-page="./ExternalLogin"
                  asp-route-returnUrl="@Model.ReturnUrl"
                  method="post" class="form-horizontal">
                <div>
                    <p>
                        @foreach (var provider in Model.ExternalLogins)
                        {
                            string logo = "";
                            string cssButton = "btn-primary";
                            switch (provider.Name)
                            {
                                case "Facebook":
                                    logo = "<i class=\"fab fa-facebook mr-2\"></i>";
                                    break;
                                case "Google":
                                    logo = "<i class=\"fab fa-google-plus mr-2\"></i>";
                                    cssButton = "btn-danger";
                                    break;
                                case "Microsoft":
                                    logo = "<i class=\"fab fa-microsoft mr-2\"></i>";
                                    break;
                                case "Twitter":
                                    logo = "<i class=\"fab fa-twitter mr-2\"></i>";
                                    cssButton = "btn-info";
                                    break;
                            }

                            <button type="submit" class="btn btn-block @cssButton"
                                    name="provider" value="@provider.Name"
                                    title="Log in using your @provider.DisplayName account">
                                @Html.Raw(logo) @provider.DisplayName
                            </button>
                        }
                    </p>
                </div>
            </form>
        }
    }
</div>
It is simple: I have only added the icon for each provider using Font Awesome and add the CSS for the button.
Add Facebook authentication
First, add the Microsoft.AspNetCore.Authentication.Facebook NuGet package to the project.
Navigate to the Facebook Developers app page and sign in. If you don’t already have a Facebook account, use the Sign up for Facebook link on the login page to create one. Once you have a Facebook account, follow the instructions to register as a Facebook Developer. Then, click on My apps and Create new app.

Then, I have to choose what kind of application I want to connect with Facebook.

Then, fill the form with your data.

Click on Create App. Then, I’m redirected to the project dashboard. At the top of the page, I have the App ID and the App Secret.

Copy those values in the appsettings.cs and, magically, if you run the project, in the login page, you have the Facebook button.
Add Google authentication
Next step in the integration of external providers in AdminLTE project is to add to your solution this NuGet package Microsoft.AspNetCore.Authentication.Google. Then, navigate to Google Developer portal to Configure a project.

Then, in the dashboard, click on APIs & Services (as in the following image).

So, you are now in the Console Developer Google website. What we have to do is to allow the application to authenticate with Google.

OAuth consent screen
Now, click on + Create credentials at the bot of the page. From the dropdown, select OAuth client ID.

Now, you have to configure the OAuth consent screen. The only option you can choose is External. Then, click Create.

Create credentials
Now, there is a form to complete with basic data. Fill the form and continue. So, we are ready for create the OAuth client ID. Again, click on + Create credentials at the bot of the page. This time you has to select what type of application are you going to create. Select Web application. In the Authorized redirect URIs text entry box, set the redirect URI. For example, https://localhost:44312/signin-google

Then, click on Create. If everything is correct, you will be redirect to the main page and a popup window appears with your credentials. Copy and paste them in the appsettings.json.

Add Microsoft authentication
So, now I’m going to add Microsoft for the integration of external providers in AdminLTE project. Add to the solution Microsoft.AspNetCore.Authentication.MicrosoftAccount. Obviously, create a new OAuth integration with Microsoft is the easy one.
- Navigate to the Azure portal – App registrations page and create or sign into a Microsoft account:
If you don’t have a Microsoft account, select Create one.

After signing in, you are redirected to the App registrations page:
- Select New registration
- Enter a Name.
- Select an option for Supported account types.
- The
MicrosoftAccountpackage supports App Registrations created using “Accounts in any organizational directory” or “Accounts in any organizational directory and Microsoft accounts” options by default. - To use other options, set
AuthorizationEndpointandTokenEndpointmembers ofMicrosoftAccountOptionsused to initialize the Microsoft Account authentication to the URLs displayed on Endpoints page of the App Registration after it is created (available by clicking Endpoints on the Overview page).
- The
- Under Redirect URI, enter your development URL with
/signin-microsoftappended. For example,https://localhost:5001/signin-microsoft. The Microsoft authentication scheme configured later in this sample will automatically handle requests at/signin-microsoftroute to implement the OAuth flow. - Select Register

So, in the dashboard for the application, you find the Application (client) Id. Copy this value a paste in the appsettings.json.
Create client secret
So, next step is to create a client secret for the application.
- In the left pane, select Certificates & secrets.
- Under Client secrets, select New client secret
- Add a description for the client secret.
- Select the Add button.
- Under Client secrets, copy the value of the client secret and paste in the
appsettings.json
The URI segment /signin-microsoft is set as the default callback of the Microsoft authentication provider. You can change the default callback URI while configuring the Microsoft authentication middleware via the inherited RemoteAuthenticationOptions.CallbackPath property of the MicrosoftAccountOptions class.

Add Twitter authentication
As usual, add the NuGet package for Twitter called Microsoft.AspNetCore.Authentication.Twitter and then open the Twitter Developer portal.

On the left bar, click on Overview under Project & apps. Then, under Standalone Apps, click + Create App.

Then, type a unique name for your application and click Create. And, voila’…. Everything you need.

Conclusion
In conclusion, very long post but at the end the integration with external providers in AdminLTE project is done!
Then, you find all code on GitHub. If you have any question, please use my forum.

2 thoughts on “External providers in AdminLTE project”